Welcome to Your Flavour Odyssey
Dive into making Baked Lamb Kibbeh with my easy-to-follow guide. This Middle Eastern dish isn’t just delicious; it’s also about the art of cutting it perfectly. If you love tasty, authentic food, you’ll find my guide helpful. It shows you how to cut Kibbeh like a pro, ensuring beautiful slices every time. And if you haven’t yet tried making Kibbeh, check out my Kibbeh recipe to get started. Plus, discover my smart storage solution on the kibbeh freezer hack blog for saving space in your freezer without compromising the quality of your Kibbeh.
Kibbeh is more than just a dish; it’s a symbol of celebration and togetherness for us. Often served during festive occasions, it brings families and friends together around the table. In our tradition, we enjoy Kibbeh raw one day and transform the leftovers into a succulent Baked Lamb Kibbeh the next. This not only reflects our ingenuity in the kitchen but also our love for reimagining flavours and textures. Join me in celebrating this culinary tradition, where every bite is a testament to shared joy and culinary heritage.
Why Cutting Matters
Before we delve into the “how-to,” let’s talk about why cutting your Kibbeh before baking is so vital. The texture, the look, and the very essence of the dish depend on those initial incisions. Get them wrong, and you’ll have a dish that’s less than perfect. Get them right, and you elevate your Kibbeh from homemade to restaurant-worthy.
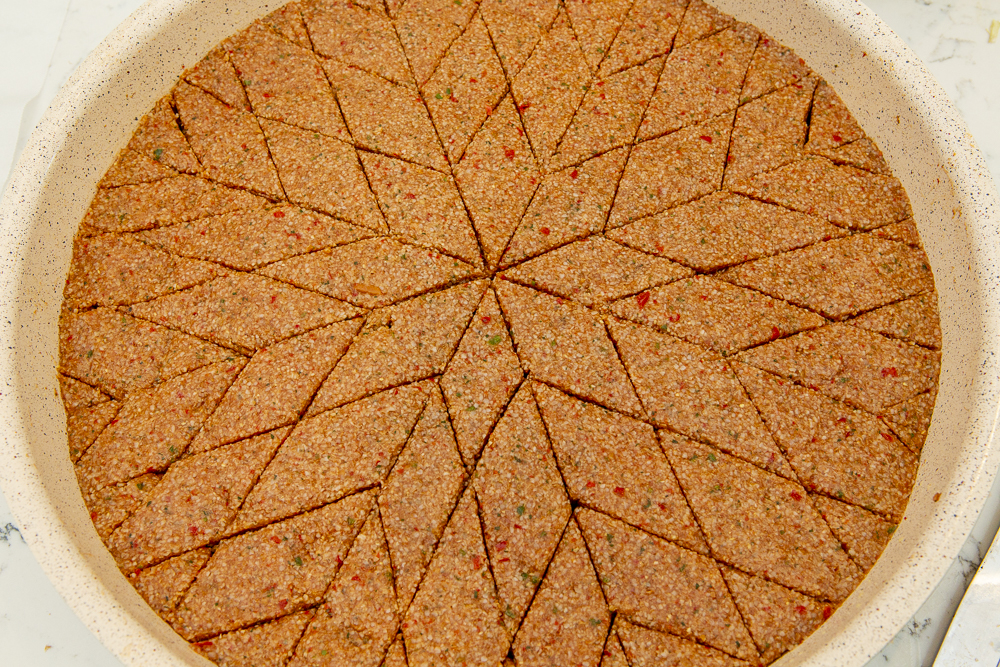
Tools You’ll Need
The secret to the perfect slice is no secret at all; it’s about having the right knife. A sharp, long-bladed knife is your best friend here, and keeping it wet is the trick to clean cuts that don’t drag. Each slice should be confident and swift, and the knife should be wiped clean after every cut to avoid sticking. If you’re in need of a quality knife that makes the job easier, check out my recommended knife for perfect Kibbeh slices.
Selecting the Ideal Tray for Your Kibbeh
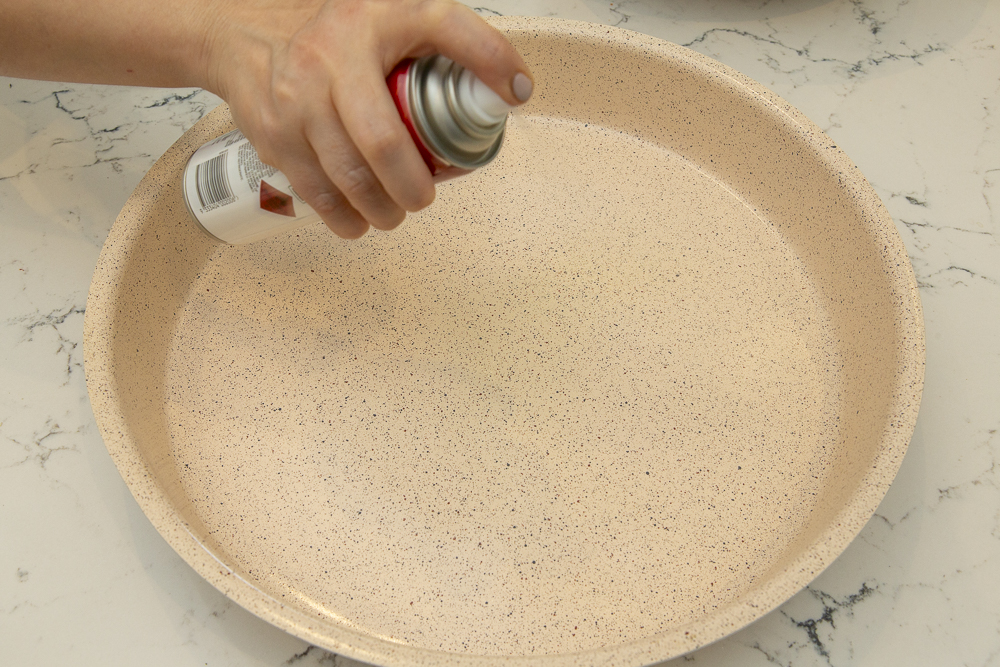
A key element in crafting the perfect Baked Lamb Kibbeh is choosing the right tray. For my recipe quantities, a 40 cm round tray is just perfect. It’s not only about fitting the mixture ideally but also about achieving that distinct, impressive diamond pattern which is a hallmark of this dish. While you can use rectangular trays, they won’t provide the same captivating finish. The round tray truly elevates the presentation, making each slice a visual delight. To get your hands on a tray like the one I use, check out this link to the 40 cm round tray. And remember, using my code ‘roubasfood‘ gets you a 10% discount on your purchase, anytime!
Expert Tips for the Perfect Kibbeh Cut
Alongside my visual guide, here are some of my tips to ensure your Kibbeh cutting is both efficient and elegant:
-
The Initial Score: Before making any deep cuts, gently score the surface of your Kibbeh to outline where your pieces will be. Think of this as the blueprint for your subsequent slicing, a crucial step to ensure even and beautiful portions.
-
The First Cut: Armed with your sharp, wet knife, follow the scored lines to make your initial cuts. Remember to divide the task into sections, wiping your knife clean after each slice to prevent the mixture from sticking and ruining the perfect edges.
-
Turn, Don’t Reach: Don’t stretch awkwardly across the tin; rotate it instead. This simple yet effective movement ensures that every slice is precise, and it also spares you the strain. It’s about bringing the work to you, not the other way around.
-
The Final Checks: With all pieces cut, it’s time for a quality check. Look over the Kibbeh, ensuring that each slice meets your standard. Every segment should not only taste delightful but also present as a visual treat, a testament to your craftsmanship.
Detailed Step-by-Step Cutting Guide
Creating the Initial Quadrants: Score the surface of your kibbeh mixture to divide it into four large, equal sections, cutting all the way through to the bottom of the pan. This initial complete separation is important for the kibbeh to maintain its shape during baking and serving.
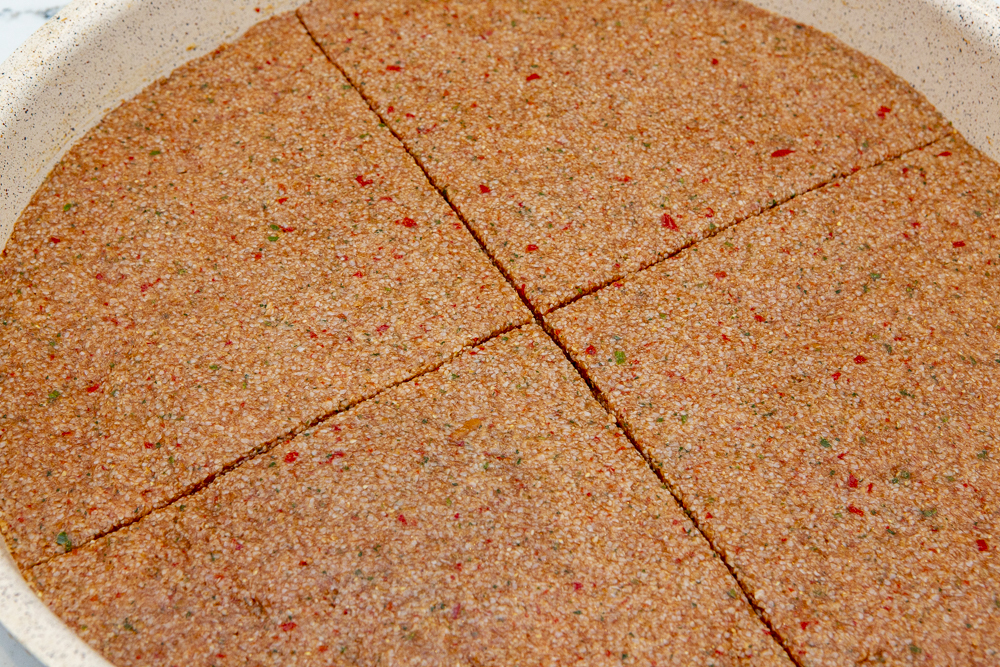
Halving the Quadrants: Take each quadrant and slice again from the center to the edge, cutting through to the bottom, to create eight distinct pie-shaped wedges. It’s vital to ensure that these cuts are clean and precise for the perfect presentation.

Forming the Diamonds: Now, create the classic diamond pattern by making diagonal cuts across each of the eight sections. These cuts should intersect with the initial straight cuts and should go all the way through to the base of the pan, ensuring that each piece is fully separated.
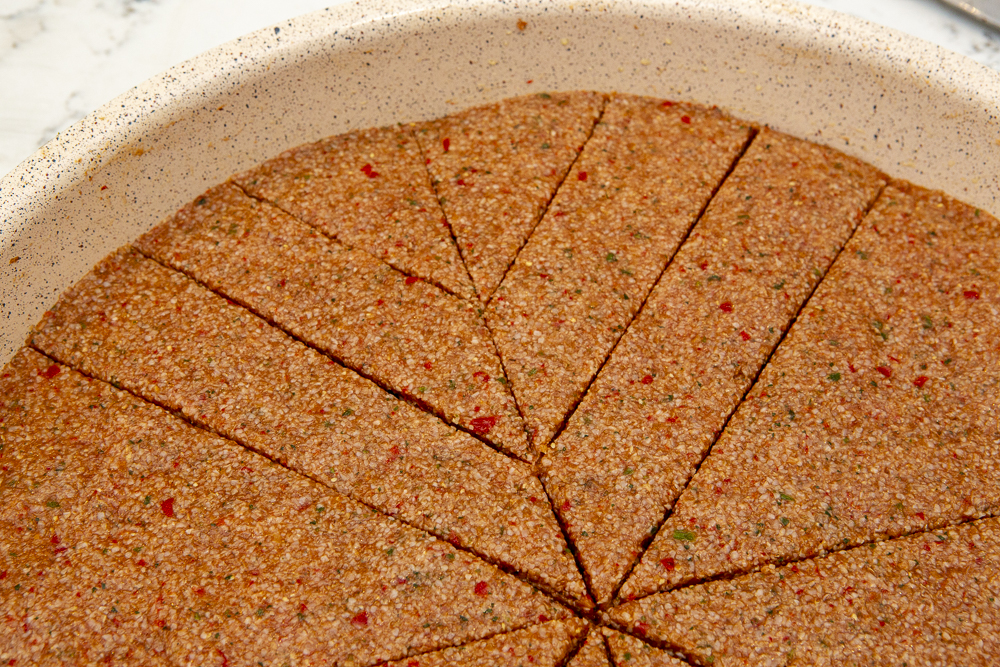
Refining the Diamond Cuts: Continue cutting diagonally in the opposite direction, intersecting the previous cuts to form the diamond shapes. The kibbeh should now be fully portioned, with the pattern clear and defined. The best way to visualise and study this pattern is to look at the photo that displays a single quarter below, which makes it easier on the eye.
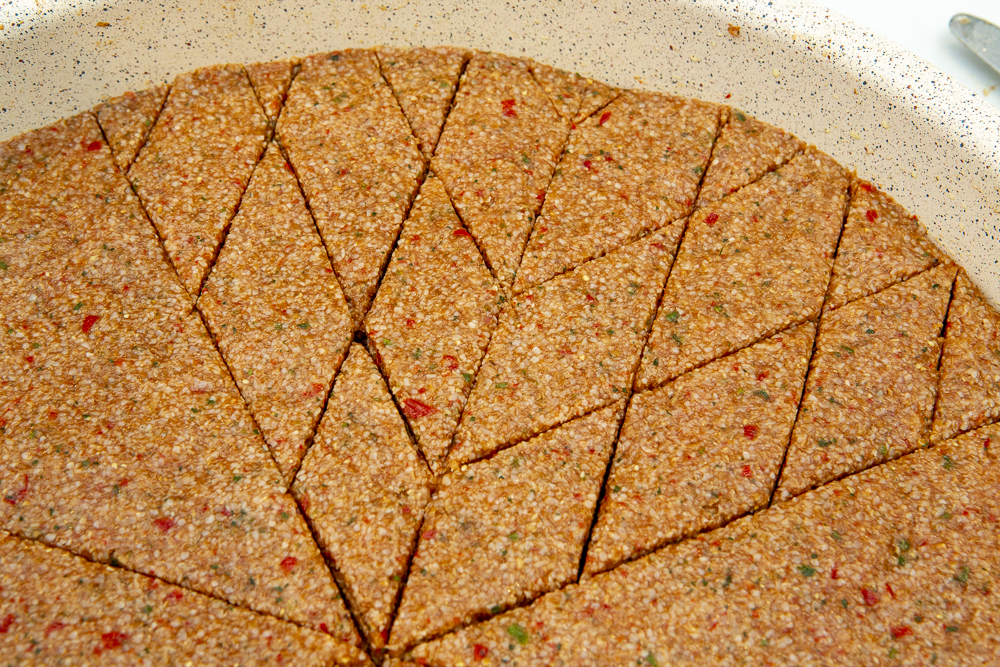

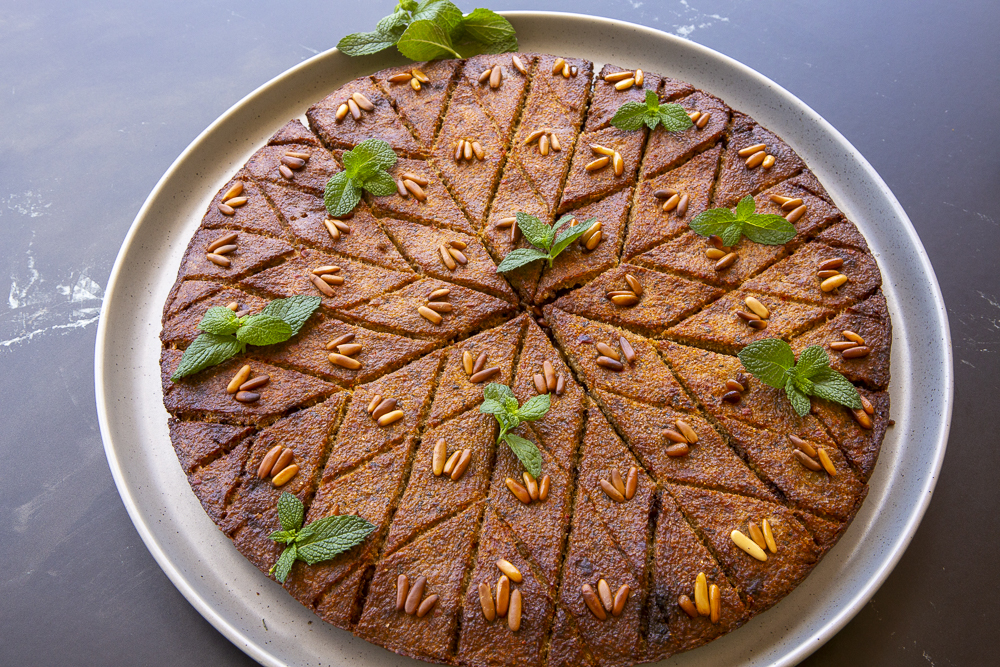
Garnishing with a Personal Touch: Traditionally, each diamond-shaped piece of kibbeh is adorned with a single pine nut. However, if you’ve been following my recipes, you know I like to add my own twist to traditional dishes. So, for this recipe, we’ll be placing three pine nuts on each diamond piece. This not only adds a richer texture and more nuanced flavour but also puts a distinctive stamp on the dish, making it uniquely yours. Press them gently into the kibbeh to secure them in place, ready for baking.

Baking to Perfection
With the cutting complete, it’s time to bake. But remember, those beautiful cuts you’ve just made are not just for show; they’ll ensure your Kibbeh cooks evenly and looks stunning on the plate. And hey, if yours turns out a tad overdone like mine, no worries – we’re keeping it real here!
Freeze with Finesse
On my blog, you’ll find the guide to freezing your Baked Lamb Kibbeh so that not a single inch of freezer space is wasted, and your Kibbeh remains as delicious as the day it was baked.

Beyond Kibbeh: Freezer-Friendly Sweets
And why stop at Kibbeh? In the spirit of a feast for the eyes as well as the palate, I invite you to explore my other recipes that are both freezer-friendly and visually stunning. From the syrupy layers of baklawa to the sweet, textured bliss of markroota, these treats are perfect for cutting up, serving on a tray, and enjoying at leisure.
Wrapping It Up: Your Kibbeh, Perfected
The art of cutting your Baked Lamb Kibbeh is more than a step in the cooking process; it’s a rite of passage into a world where food is crafted with care and tradition. Be sure to check out the full recipe on my blog, and don’t miss the invaluable tips on clever freezing. With these skills in your culinary repertoire, you’re ready to create dishes that not only taste incredible but are presented with professional finesse.
Happy cooking, and even happier eating!



2 Responses
thank you Rouba for your work! i made kebbeh yesterday and my attempt at a pro presentation was hilarious, i actually googled “how to cut kebbeh” and followed someone on Youtube but what i saw and what my hands did were 2 different things 😂, but i’m so happy you posted this step by step and cant wait to use your instructions next time for a beautiful kebbeh finish xx
Ronia, I know exactly how you feel. Lol you made me laugh. I was imagining you actually doing it and remembering myself do the same. I am so visual and I still get it wrong. let me know how you go with my step by step explanations. Can’t wait for you to try it!!