I am a great believer in food bringing people together and there’s nothing that does that task better than a delicious cheese board.
There’s also nothing easier than putting together a cheese platter for your gathering. And it will look like you have spent a lot of time crafting it when in reality it takes just 10-15 minutes once you have laid out your ingredients.
I really love preparing cheese boards for my get-togethers with friends and for family parties. The best part is that you can make them large enough to feed a full house of guests or small enough for a casual Saturday night with your best friend.
In this journal, I’m going to share with you the steps you have to follow to create the perfect cheese board for your guests—let there be 20 people or just 2 or 3 friends.
The one thing you have to remember before getting started is to not be afraid to get creative and have fun with it – Right now you’re already one step closer to making a beautiful and delicious cheese board!
Preparation is key
Having everything you need before you start to assemble your cheese platter is essential:
- Choose a large enough board on which you can arrange each item while maintaining visual order. Don’t forget to make sure that the surface of the board is food safe.
- Write down a list of all the ingredients you need so you don’t forget to buy things when you go shopping. We are all guilty of this I believe—there’s always that one important ingredient that you forget and you must go back to buy.
- Cheese is the queen of this dish. Make sure to choose 2-3 different kinds of cheese depending on the size of your board – generally, this will include a hard, a soft and a blue one. Aim for each cheese to be different in colour, shape and flavour. You want to also avoid having all cheeses with the same texture.
There are different types of cheese to consider. You can go to a speciality cheese shop and ask the staff to try it before making your final decision:
Hard Cheeses
- Cheddar
- Colby
- Provolone
- Gouda
- Parmesan
- Manchego
Soft Cheeses
- Brie
- Goat cheese
- Soft blue cheese
- Gorgonzola
- Camembert
- Ricotta
Key tip: Cheese tastes better at room temperature so I highly suggest you take the cheese out of the fridge at least an hour before serving it to allow it to come to room temperature.
Now that we’ve got everything checked, let’s jump straight into it!
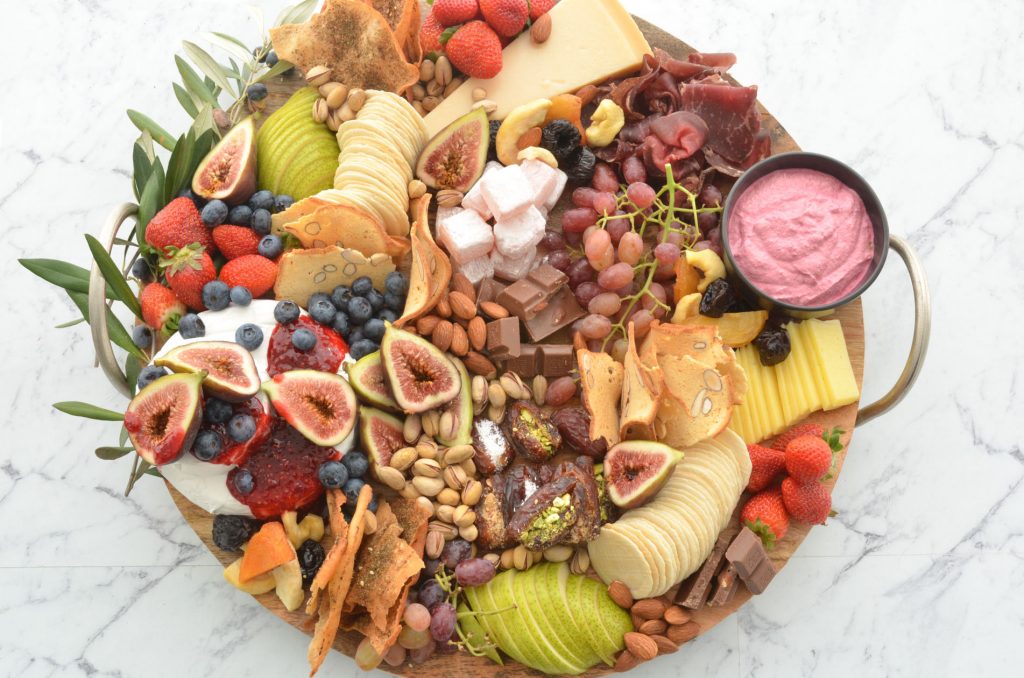
How to make a cheese board step-by-step [visual guide]
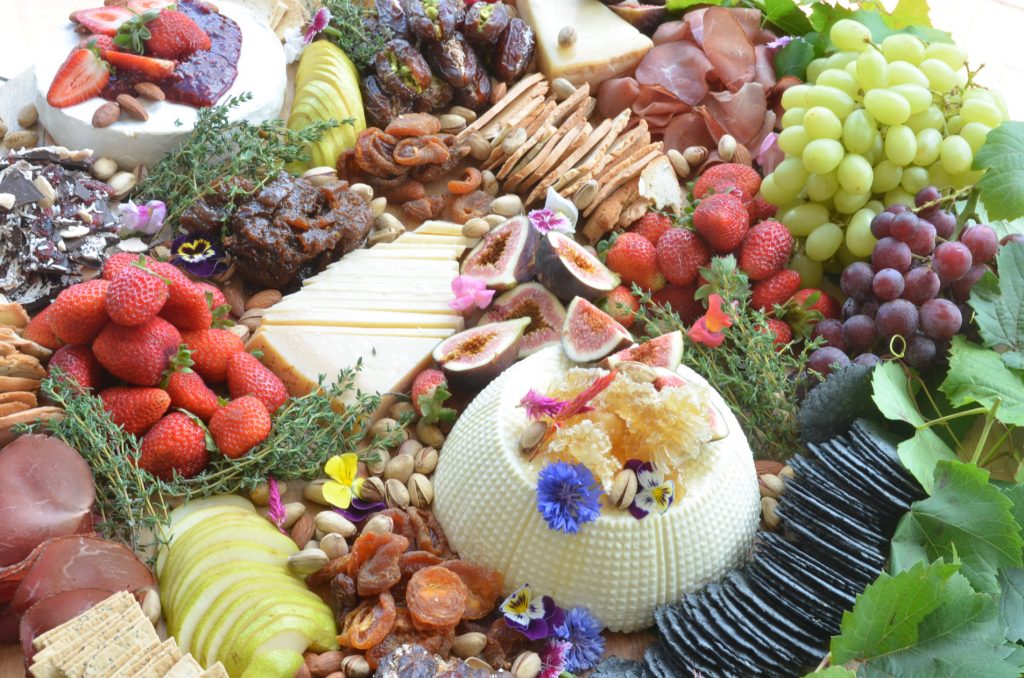
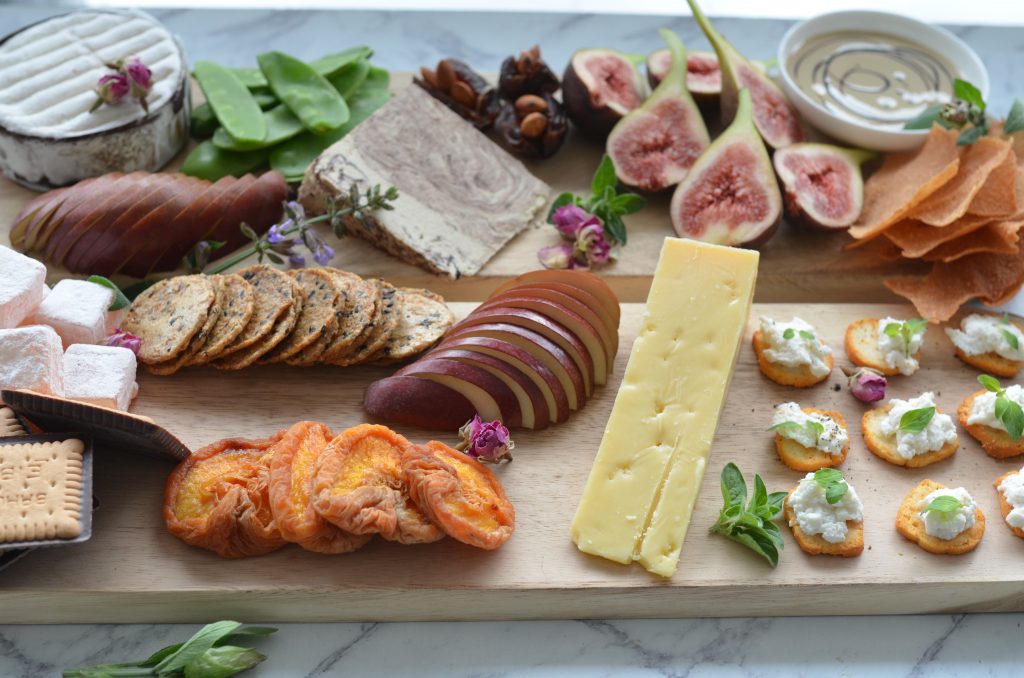
The cheese board I created can serve a gathering of around 20-30 people. In terms of cheese quantity, I used 450g of soft cheese (large round brie), 120g of soft cheese (smaller round brie), 200g of parmesan and 200g of aged cheddar.
Note: For those of you that want to create a cheese board for a small group of friends, I have some recommendations for a simplified version at the end of this section.
Step 1: Arrange the smaller cheese on top

Create height by adding a smaller soft cheese on top of the larger one. Choose your cheeses wisely so your layers look nice. Round cheeses look delightful layered and you will find them in all sizes – which makes them perfect for layering.
Step 2: Add your choice of meat
Your cold meat or vegetarian choices here are endless. I’ve chosen to use bresaola which is a family favourite in our home. Also, cured meat is a delight for most pallets so think marble meats, thin prosciutto, or salami.
For your vegetarian friends, you can add veggie sticks which are perfect with any dip instead.
Step 3: Crackers are a must

No cheese board is complete without crackers. There are no rules for what crackers to use. I recommend you pick at least two different types. Moreover, a gluten-free option is always a good idea to have. Stack the crackers towards the edges of the board to keep the board looking neat and make them easy to grab.
Step 4: Add some sliced pears
Pears are wonderful accompaniments that go great with any cheese. If you prefer to use apples, they work just as well. Don’t forget to drizzle the fruits with a splash of lemon juice to keep them from browning.
However, if you feel like changing it up completely, you should try the Fuyu persimmons. They are sweet and mild with a great texture and go well with soft cheeses like goat cheese or Camembert. Also, most likely not many people have tried them so they will certainly add a pop of colour to your board and start up conversations.
Step 5: Enhance the flavours with dips
Dips can be served in bowls of various sizes, shapes and colours – you can let your creativity loose. They can bring new flavours to your board and also add a pop of colour to your platter. My recommendation is to choose a vibrant colour dip and place it into a bowl to add dimension and height to your cheese board.
If you have time, you can try my chunky avocado dip or my delicious beetroot labneh dip. However, if you want to save some time for the other dishes you want to prepare for your gathering, you can go ahead and use pre-made dips from the store.
Step 6: Add grapes for crunchiness
Grapes give a natural sweetness and crunch and pair wonderfully with soft cheese. You can use either red or green seedless grapes but make sure to leave the stem on to make the platter visually appealing. You can also clip the grapes using scissors into smaller clusters to make them easy to grab off the board.
Step 7: Add dates and figs for sweetness
Dates are sweet and pair with stronger flavoured cheese like blue or goat cheese. You can use any variety of dates. Here’s what you need to do if you decide to stuff them: make a small slit length-ways in the date, remove the pit, and stuff it with coarsely ground pistachio or desiccated coconut.
Fresh figs pair well with firm and hard cheese due to their soft texture and sweet flavour. You can halve them to create a beautiful colour. If fresh figs are not in season, you can substitute them with dried figs.
Step 8: Add some Turkish delight
Turkish delight is my old-time favourite. This is why I include it on all my grazing boards. Some sweet suggestions for you to include instead of Turkish delight: piled-up jelly beans, liquorice, yogurt-covered pretzels, marshmallows, mini brownies, or rocky road.
Step 9: Add a little berry flavour

Strawberries are lush, bold, and sweet and are perfect for your guests to snack on. If your strawberries are large, slice them in half lengthways through the stem and leave the greenery on for a fun presentation. If they are unavailable, cherries are a good substitute. Just make sure to avoid juicy fruits like watermelon or peaches as they will run all over the board.
Also, fresh blueberries are a must for colour and crunch. There’s something about the combination of their tart-sweet flavour and cheese boards. They just seem to work!
For an extra special effect, add a bit of raspberry compote to your board – this will enhance the flavour of the cheese.
Step 10: Add dried fruits for chewiness
Dried fruits are colourful, flavourful and easy accompaniments to your board. The variety you choose is completely up to you. They will add a chewy element to the cheese platter.
Step 11: Don’t forget about the bread
There are no doubt that baguettes are the king of the bread world. So they are a must! You can use fresh baguette slices instead of fried bread. To toast the baguette, you first have to thinly slice it, drizzle it with olive oil, and bake it at 190° degrees for a few minutes until lightly browned.
Moreover, you can use almond bread to add shape and texture to the board. Pre-made almond bread can be found in most supermarkets. Nuts and fruit crisps, biscotti or rustic flatbreads will also work.
Step 12: Add nuts to bring your board together
Nuts will help you fill any remaining gaps on your cheese board and they go great with everything you have used on this platter by now. I highly advise choosing only 2 nuts for your board. Here are some suggestions: walnuts, almonds, pistachio, macadamia nuts, hazelnuts and pecans.
Step 13: one magic word – CHOCOLATE
Everyone loves chocolate, right? There are no rules here – nor should there ever be. Signed, by every chocolate lover out there.
Extra: Add the final touches to your cheese board
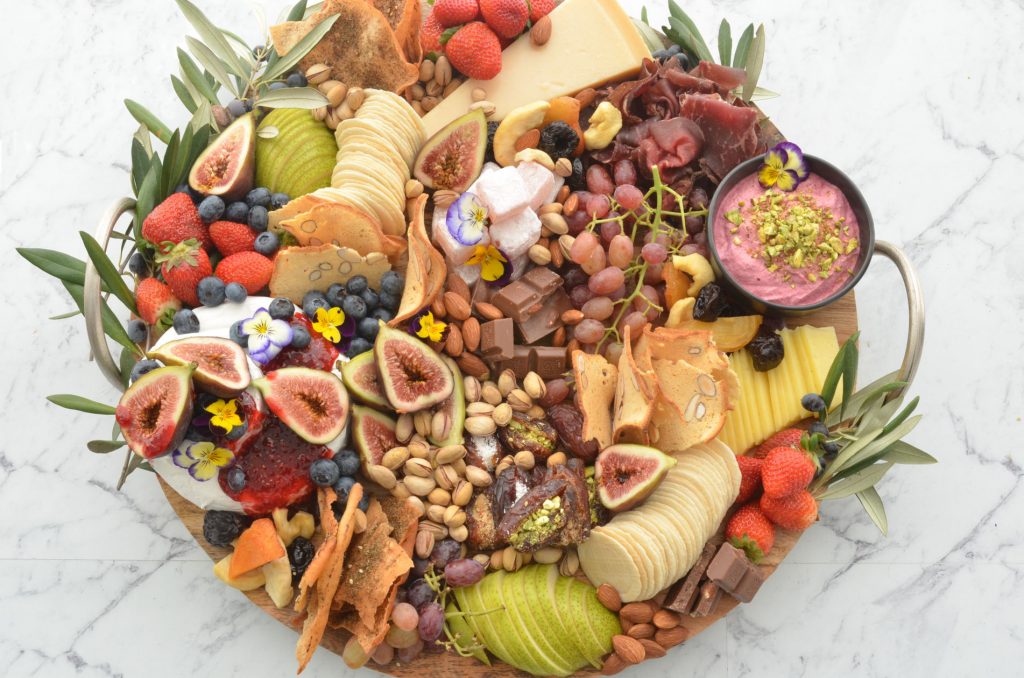
- Use edible flowers to add a delicate touch to your grazing board. Choose some smaller fresh flowers and add them sparingly across the platter.
- Fill out any empty spaces on your board with nuts or berries; however, make sure to stick to the two varieties you chose earlier.
- Garnish your dip with a contrasting colour – I chose to garnish the beetroot labneh dip with pistachios as the colours pair each other beautifully.
- Add branches or herbs (rosemary sprigs work really well on a cheese board) to add extra height and colour. Olive branches have small leaves and are flexible enough so you can tuck them around the edges to help frame your board. They are also my go-to because they are a symbol of connectedness and family love.
Key tip: cheese boards are meant to look artful but they need to also be practical so don’t overthink it. Download your step-by-step guide here
Cheese boards come in all shapes and sizes
If you have a dinner party with your closest friends and want to impress them with your carefully put-together cheese platter, just use the tips I mentioned above to adjust the board for your small gathering.
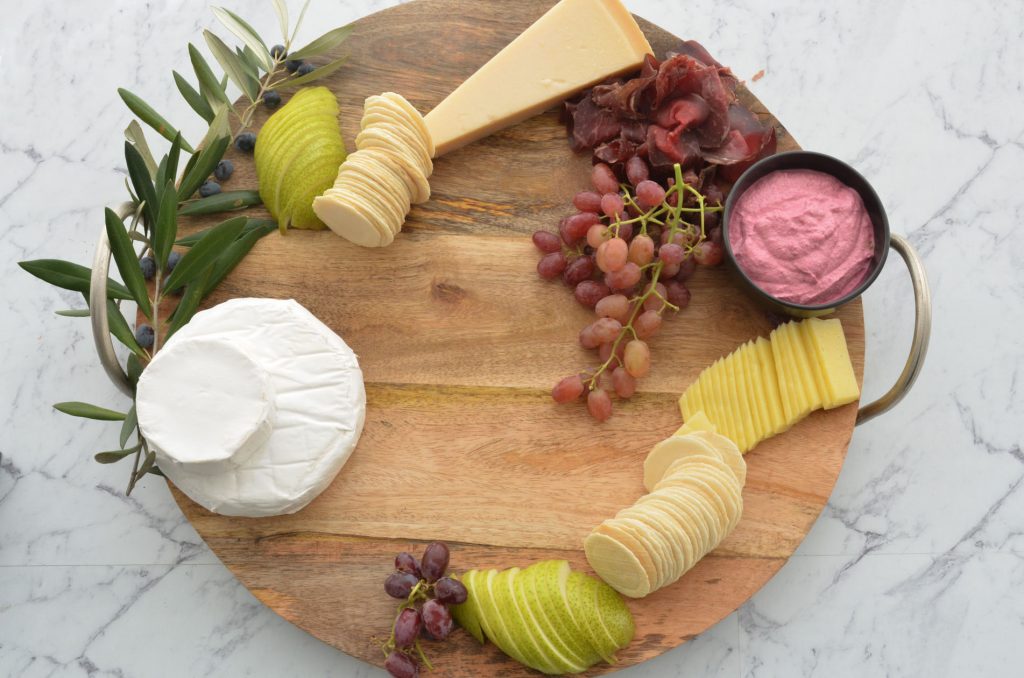
I’ve done the hard work for you and put together a step-by-step guide and video to follow and achieve exactly this. Here’s a visual guide for the prettiest cheese board made for 2-4 people.
The key here is to simplify and use the little space you have on this smaller board to your advantage. This step-by-step guide lets you get creative with colours and textures. It’s also full of useful tips and substitution suggestions so that you include the ingredients your friends will appreciate the most.
Finally, don’t forget to have fun and, most importantly, keep this a stress-free experience. Enjoy the time spent together with your guests and let the food on your cheese board be the starting point of your conversations.
If you’re preparing a cheese board for a special occasion, don’t forget to tag me on Instagram. Can’t wait to see your beautiful creations!
Download your visual step-by-step guide here
With Love
![]()